Are you looking for a guide to setting up the All in One SEO WordPress plugin?
All in One SEO is one of the best SEO plugins for WordPress. As the name suggests, this plugin has everything that you need to fulfill your SEO needs. It is an all-in-one SEO solution for all types of users. If you need full SEO control of your WordPress website in your hand then the All in One SEO plugin should be your first choice.
Like other SEO plugins, It has also both free and paid versions available. AIOSEO offers four paid versions – Basic, Plus, Pro and Elite. The Pro version is their best-selling package which you can purchase at $199.60 USD per year.
The premium version of AIOSEO offers lots of advanced features that you may not need as a beginner. So, the free version or lite version of the All in One SEO plugin should be enough for your website needs. The lite version is available for free at the WordPress repository. You can easily install it directly from your WordPress site Admin panel.
The UI of the AIOSEO plugin is also improved a lot in the last few version. Before, version 3.0 the UI was not that good. The developer team of the AIOSEO plugin did a great job on the UI to make it smooth and modern. All SEO options are organized and well-categorized.
All in One SEO is well configured by default but some important customization is still needed for better search engine ranking. So, In this article, we are going a share a detailed guide to setting up the All in One SEO WordPress plugin properly.
An Ultimate Guide to Setup All in One SEO WordPress Plugin Correctly
#1 AIOSEO SETUP WIZARD
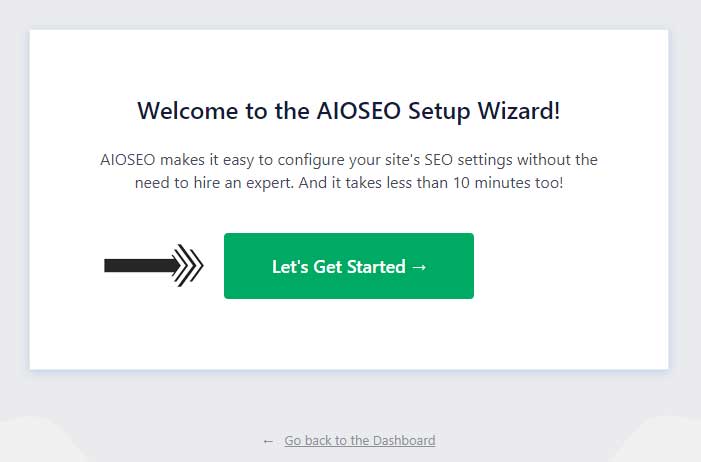
After plugin activation, you’ll be automatically redirected to the AIOSEO setup wizard for a quick configuration of basic SEO settings. To begin, click on the Let’s Get Started button.
Note: You can also change these settings later from the AIOSEO plugin interface.
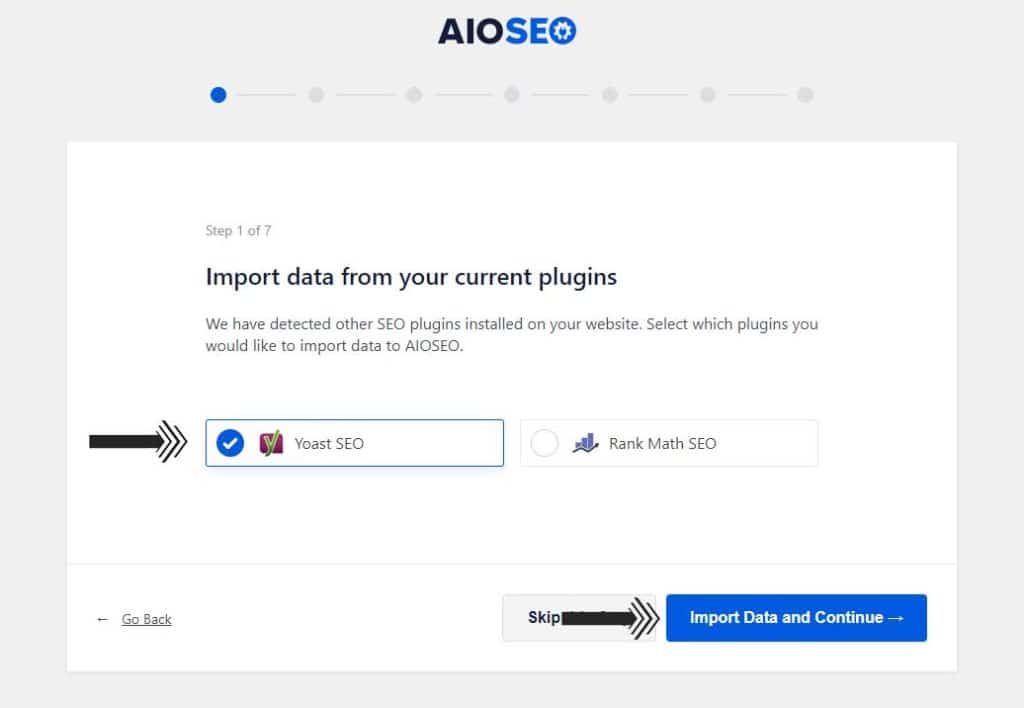
Step 1 – Import Data
In the first step, if you’re already using an SEO plugin then this wizard will automatically detect the installed SEO plugin and ask you to import data from it to AIOSEO. If you want to import data from a particular plugin then select it and click Import Data and Continue button. If there is no SEO plugin installed on your website then you’ll be directly redirected to the next step.
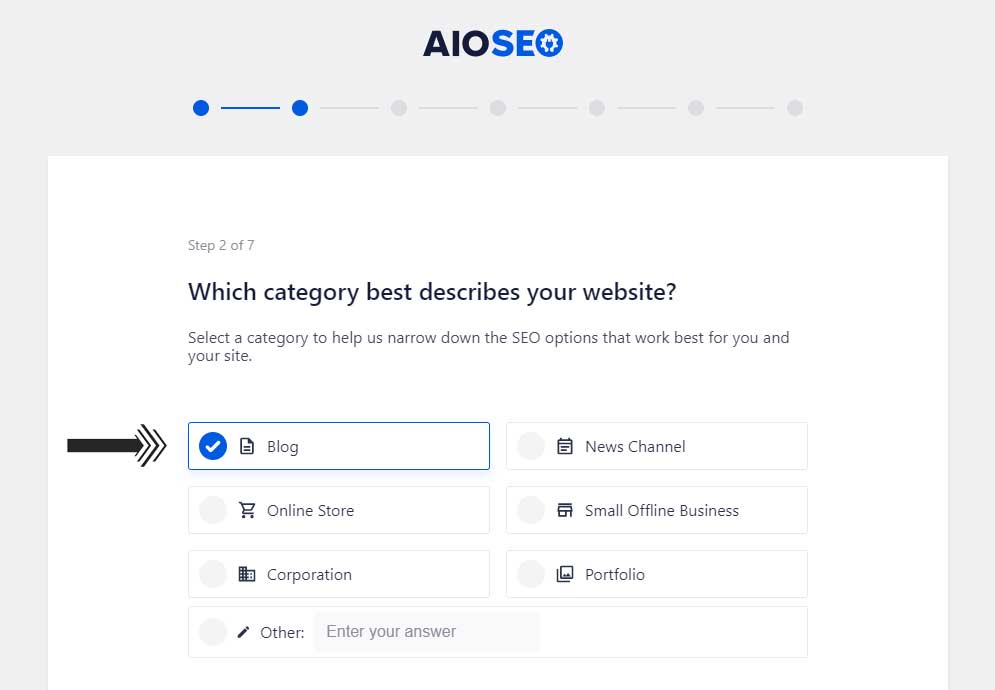
Step 2 – Website Category Selection
At this step, you’ll be asked to select a suitable category for your website. There are multiple options to choose from like Blog, Online Store, Corporation, News Channel, Portfolio, etc. So, select a category that describes your website. Our site mainly focused on creating content for readers so we selected the “Blog” option.
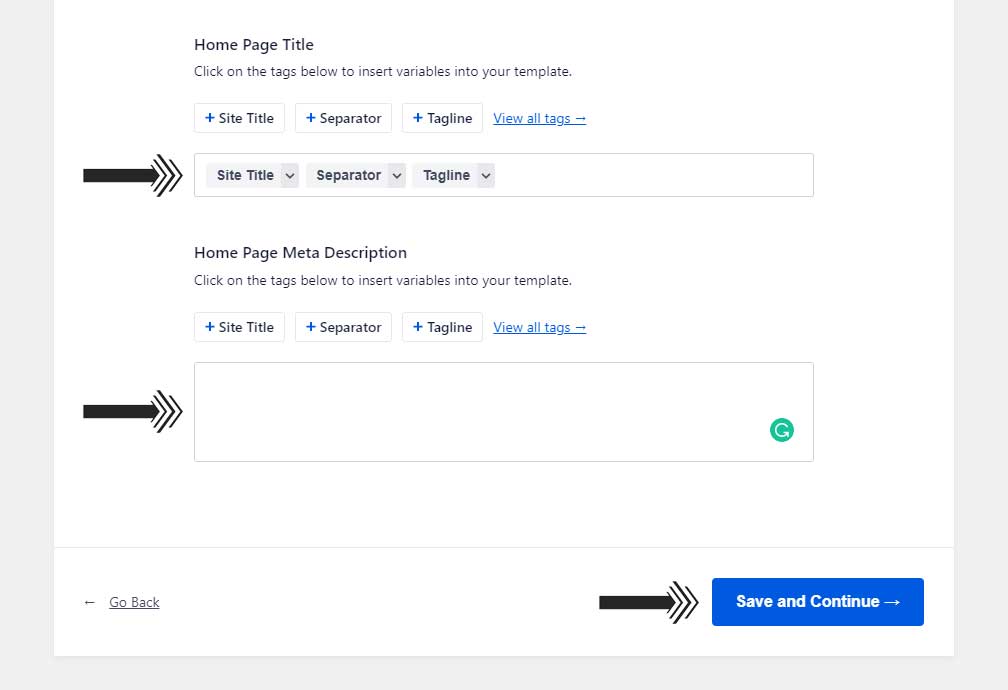
After choosing the right category for your website scroll down. Below you’ll get an option to edit the homepage metadata. Here you can set up the homepage title and meta description for your website. We recommend keeping Home Page Title settings default. And write a short introduction of your website [Max. 160 characters] on the empty field available for the Home Page Meta Description. You can also use the available tags to display the author name, current date, tagline, etc. After completing this click on Save and Continue button to go on to the next step.
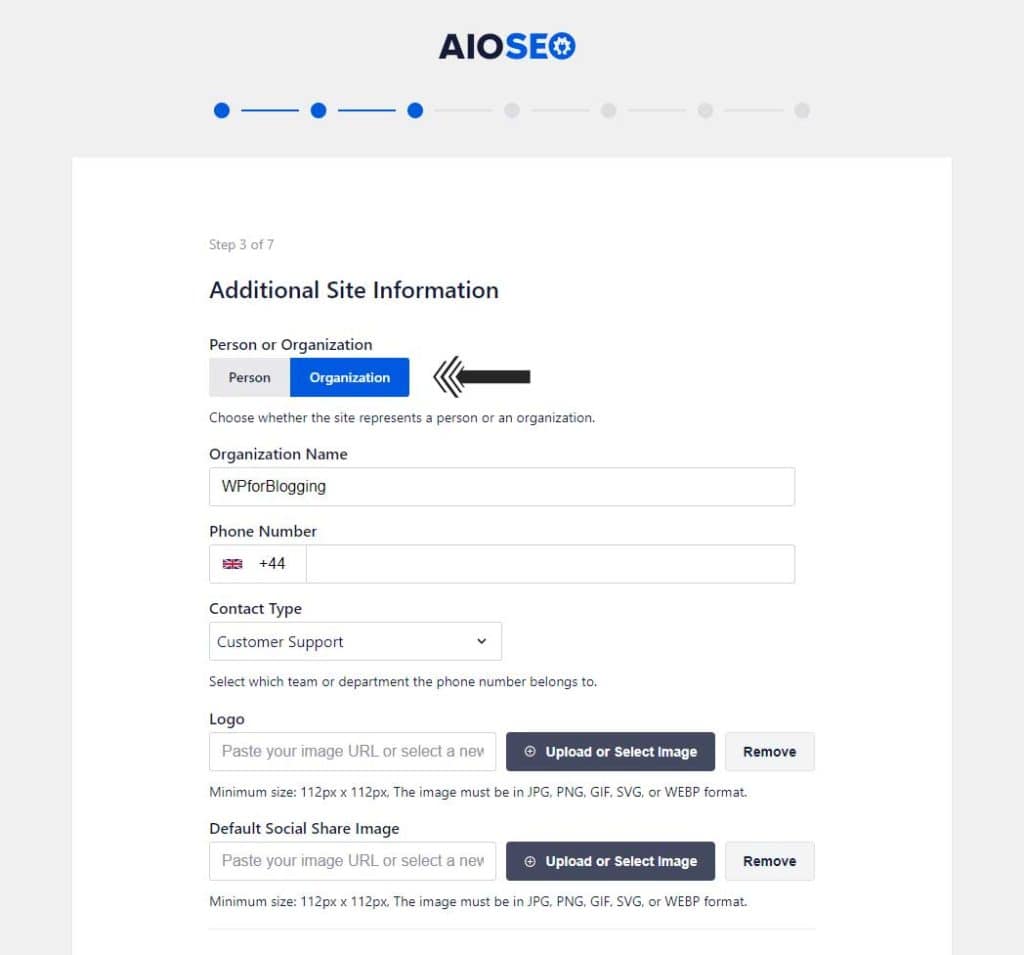
Step 3 – Additional Site Information and Social Profiles
In this step, you’ll be asked for additional information about your website. The information entered on this page will be used by search engines to learn more about your website.
At first, you have to select whether your website represents a person or organization. If you choose “Person” then it will ask you to enter the person’s name and upload a 112×112 personal avatar image. In this same way, if you choose “Organization” then it will ask you more information about your organization like organization name, contact number, and logo.
If your website is a personal blog or site then choose “Person” and if your website is a company or an agency site then choose the organization option.
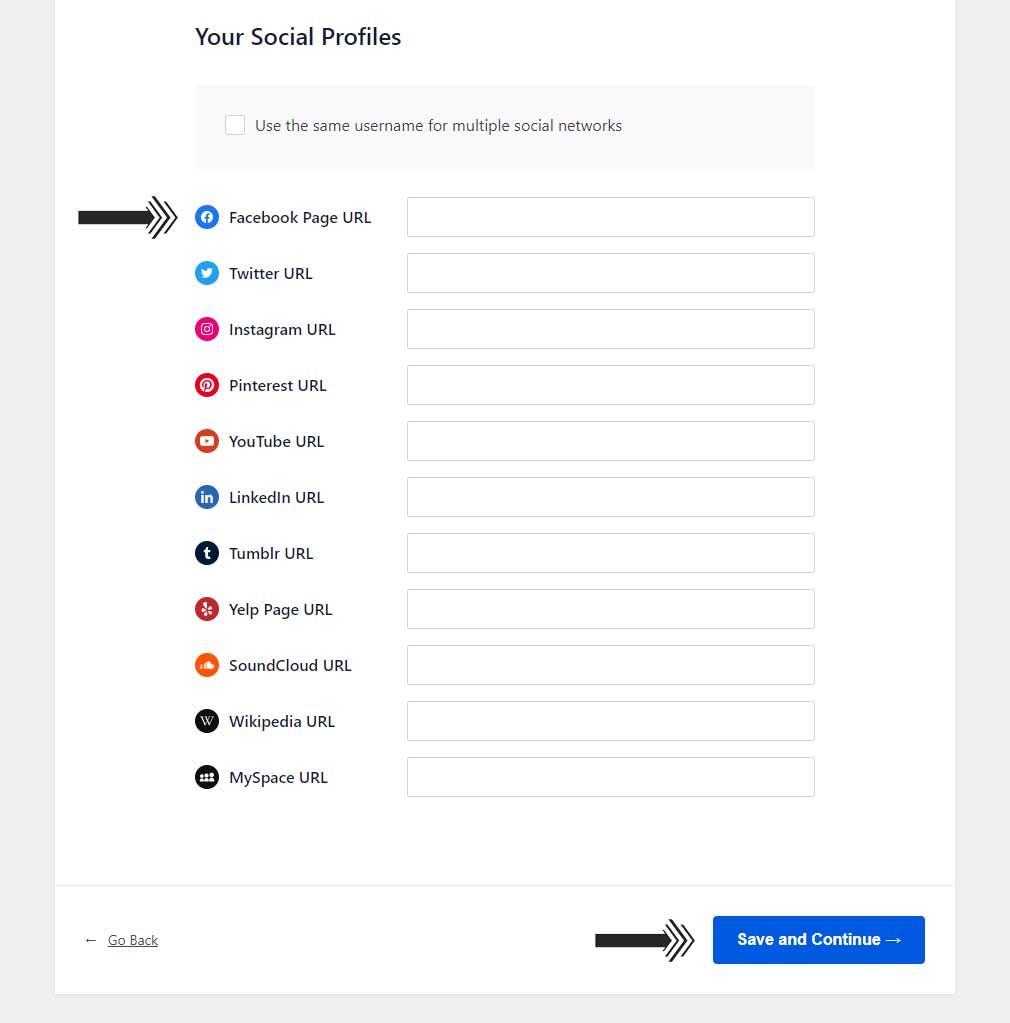
Here, you can also default social share image (optional). After filling up all details here, scroll down to the Your Social Profiles section.
In your social profiles section, enter the links of all the social networks profiles of you or your website in their respective boxes. After that, click on Save and Continue button to move forward.
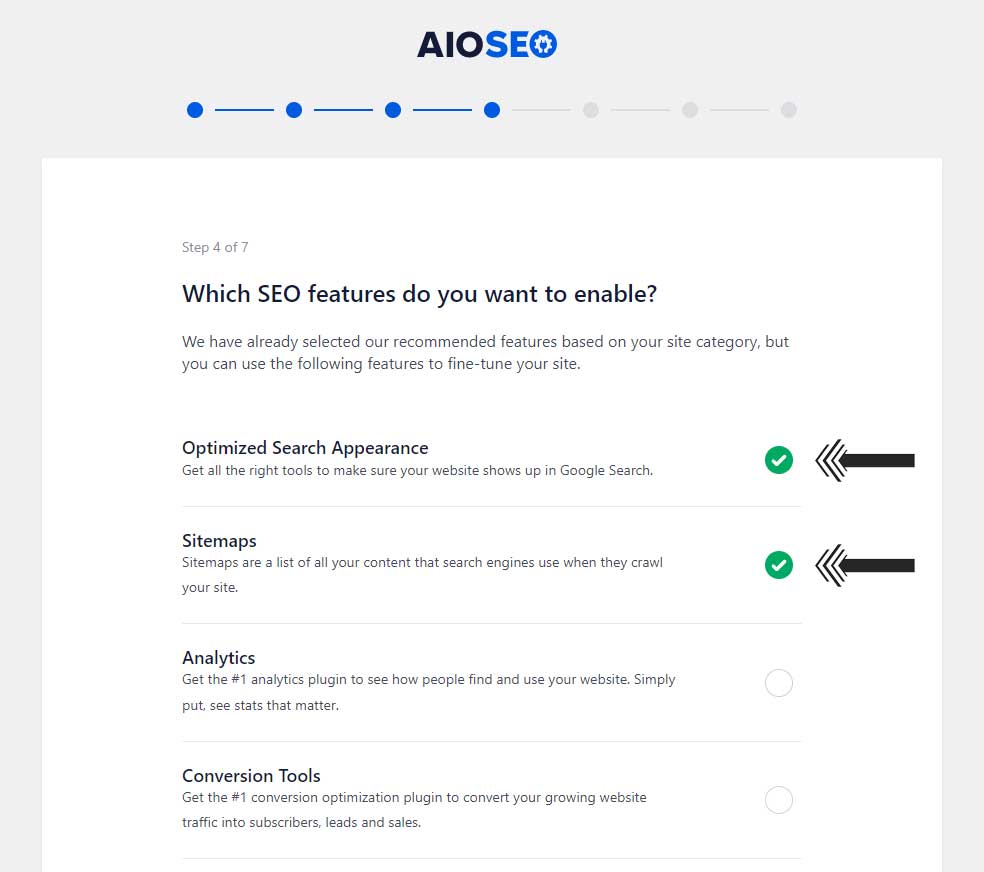
Step 4 – Enable/Disable SEO Features
On this page, you can enable or disable the SEO features provided by the All in One SEO plugin. By default, Optimized Search Appearance, Sitemaps, Analytics, Conversion Tools, and some other pro features are enabled.
If you have the Pro version of AIOSEO then keep the pro features enabled else disable all of them. Also, disable Analytics and Conversion Tools feature if you don’t need them. If you keep Analytics and Conversion Tools feature enabled then two additional plugins – “Google Analytics for WordPress by MonsterInsights and OptinMonster” will be automatically installed on your WordPress. If you have no issue with these two additional plugins and really need those features then you can keep them enabled.
The users of the free version of AIOSEO should keep only these two features enabled – Optimized Search Appearance and Sitemaps. After selecting the features, click on Save and Continue button for the next step.
Step 5 – Search Appearance
On this page, you can customize the appearance of your website in search results. Here, at the top, you can see the Google Snippet Preview of your website homepage. If something is wrong or you just want to change the appearance of your homepage then just click on the Edit Title and Description button (visible when you hover over the mouse cursor on the preview).

A setting section for the homepage will appear just below the snippet preview. It has the same options that we already filled in the first step of the AIOSEO setup wizard. Do the changes that you want to do and move forward.

If your website is still under construction then you can stop the search engines from indexing your website by selecting the Under Construction option available just below the snippet preview. When you enable Under Construction mode then all other options available on this page will automatically disappear. You have to select the Live Site option to see settings related to the sitemap.
After selecting Live Site, Below that, you’ll see “Include All Post Types”, Keep the toggle enabled to include all posts, pages, and attachments in the sitemap. Also, keep the “Enable Sitemap” option checked.
If your website has multiple authors then choose “Yes” at the “Do you have multiple authors” option else choose “No”. Next, select the option “Yes” to redirect attachment pages to the attachment itself.
After setting up all the options, Click on Save and Continue button for the next step.

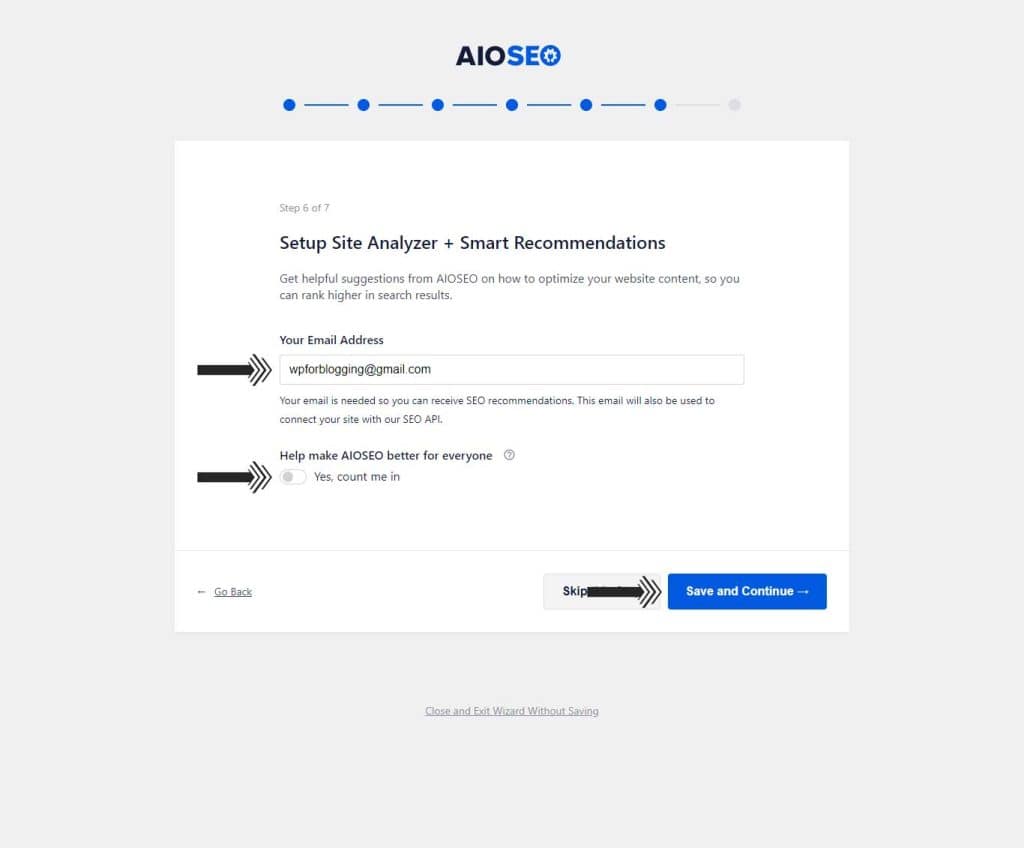
Step 6 – Setup Site Analyzer + Smart Recommendations
On this page, you will be asked to enter your email address to get notifications from AIOSEO about helpful SEO recommendations. If you’re interested then enter your email address to opt-in.
The next option on this page is asking for permission to collect anonymous data from your website. If you don’t want to share any information with AIOSEO then turn off the “Yes, count me in” toggle. After turning it off, click on Save and Continue for the next step.
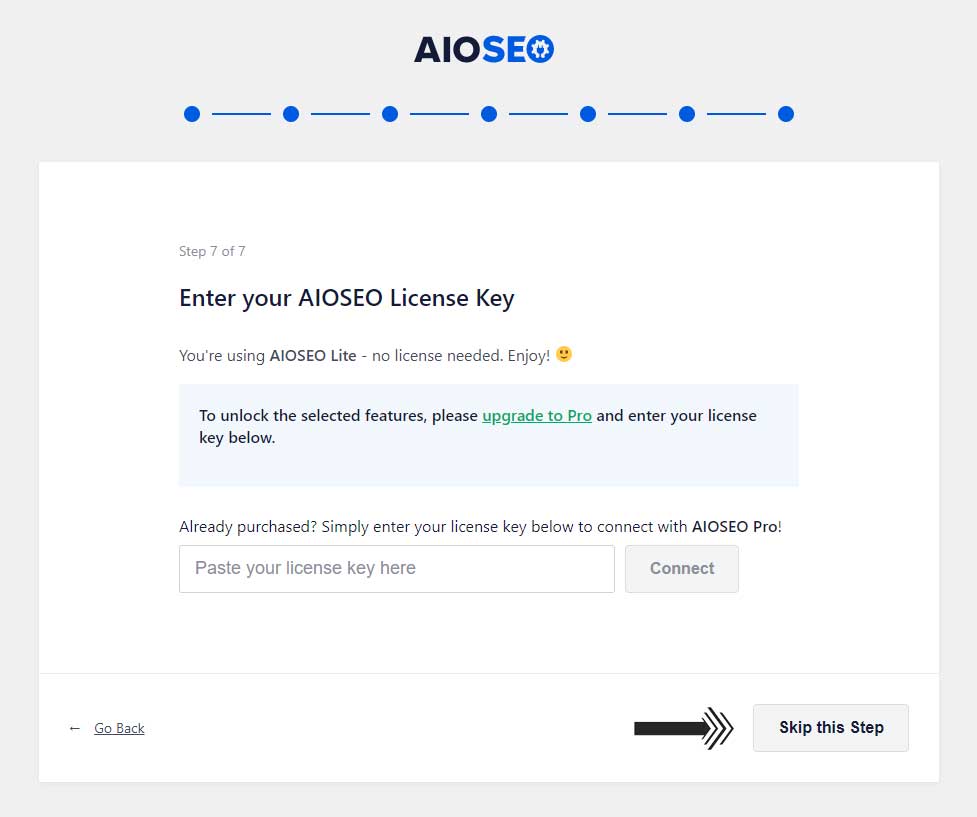
Step 7 – Enter License Key
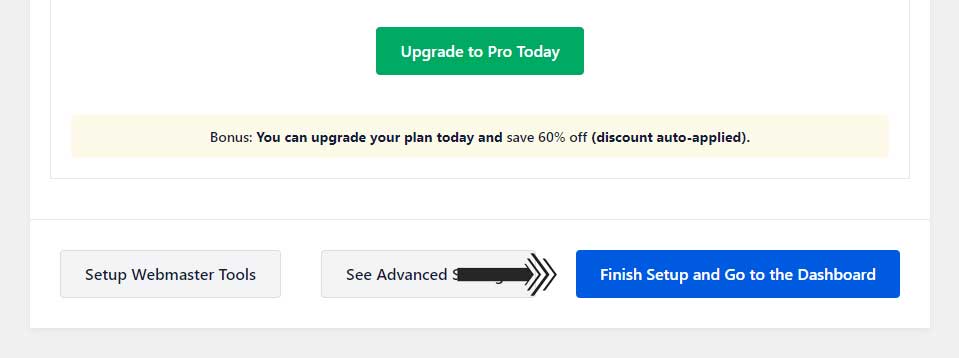
In the last step, the setup wizard will ask you to enter the license key of the All in One SEO Pro version. If you have a license key, enter it to connect your AIOSEO Pro license with your website. If you don’t have then no need to enter anything, simply click on the Skip this Step button. No license key is needed for the AIOSEO Lite version.
That’s it, you have completed the all steps of the setup wizard process of the All in One SEO WordPress plugin. Your site is now SEO ready.
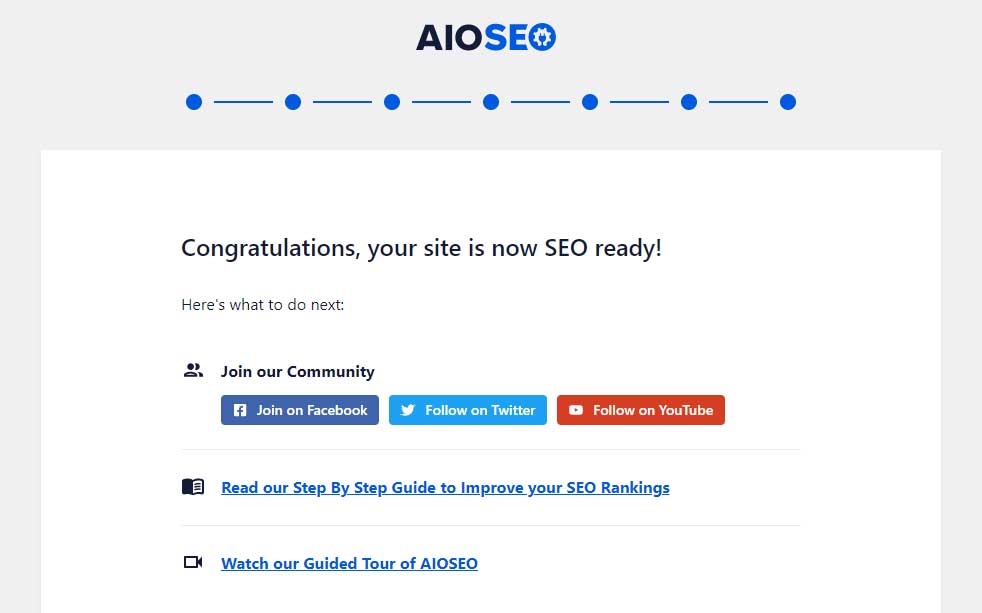
Now, click on Finish Setup and Go to the Dashboard button to complete the process.